BARE Air Free Baby Bottle Review

BARE air free baby bottles are the newest anti colic bottles around. Much to my dismay, BARE baby bottles were not available for purchase when Bunny was at the age where bottles could be useful. I was very hopeful this bottle would be available when I needed it, because Bunny was VERY picky about her bottles. BARE was exciting to me because it looked like the breast in the way the nipple works and is supposed to help baby latch just like they would at the breast, making it easy to transition from breast to bottle. The air free design looked similar to the nurser bottles which use bags, only using bags is not very eco friendly. I was very excited to receive this bottle and try it out!

Because Bunny was no longer using bottles when I received this bottle to review, I was unable to obtain first hand knowledge using the BARE baby bottle with an infant. I did give it to Bunny to try and she was able to run around and drink from it. You can definitely use this bottle in an upright position. 

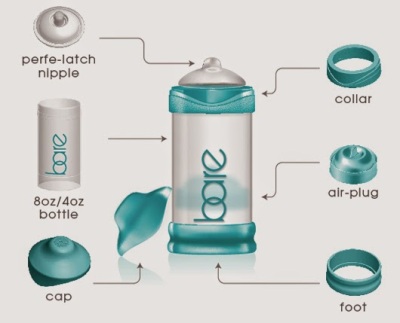
The parts of the bottle are


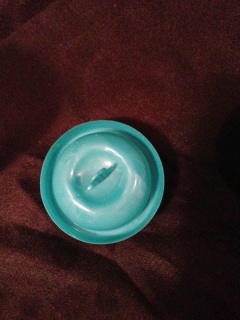
Top View of air plug
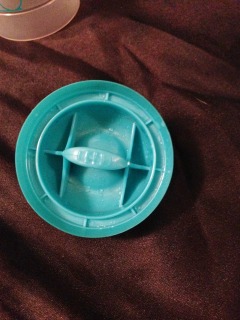
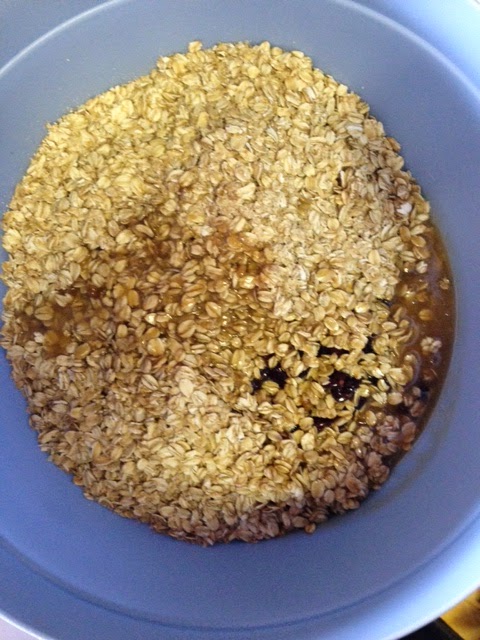
Bottom View of air plug


This is the air plug, one of the parts that makes the BARE bottle different from other bottles.  The air plug is made out of plastic and it is very thin. I damaged the first air plug I received and am not sure what I did to damage it. It is recommended to replace the air plug every 6-8 weeks. BARE is the only air free baby bottle which minimizes air ingestion known to cause gas and colic in babies.
 
How to assemble the BARE baby bottle 
 
Make sure to remove foot before installing Air-plug
 
1. Pick up bottle from the top, making sure the word “bare” reads from bottom to top, as shown. 


 2. Gently place bottle over Air-plug and push down until the base of bottle touches the flat surface. 
Do NOT insert Air-plug by hand.
 
 
  3. Press bottle evenly & firmly down over foot. The foot will raise the Air-plug to proper height inside bottle, ready to hold liquids.
 4. Fill bottle with liquid to desired measurement.
5. Gently twist nipple/collar clockwise until you feel a click. Do not over-tighten.


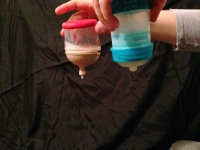
 After you have assembled and filled the bottle, now you need to expel the air. 

To expel the air you:


 1. Hold the bottle upright in one hand.
2. Push the finger ring located at the bottom center of the Air-plug with your finger while keeping the Air-plugstraight.
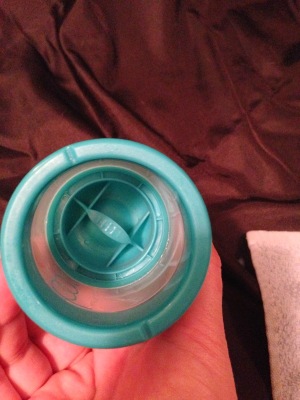
Finger Ring
make sure bottle is upright
 3. A small amount of milk will squirt out of the nipple, indicating that all air has been expelled.
 
 
There was some milk leaking out once all the air was expelled, and you can see some milk snuck into the air plug. Once the milk was done squirting out after the air was expelled, the BARE bottle stopped leaking. With BARE, there is no need to buy different staged nipples. There is only one nipple to buy, the baby used their own suction to increase or decrease the milk flow, much like nursing at the breast. Because of this, the baby controls the amount of milk as well as the pace at which s/he drinks. 


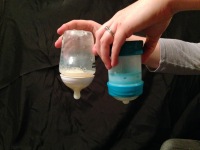
The BARE bottle did leak the first few times I used it, around the air plug. The first air plug I received became damaged, and the company sent me a new air plug. The BARE takes a few tries to get the hang of it. After a few uses I was able to properly use the air plug without any leakage. All of the parts of the BARE bottle MUST be completely dry in order to be leak free. 

I tested the leak proof ness against five other anti colic, anti air, more like the breast bottles. Only one of the five leaked when turned upside down. 


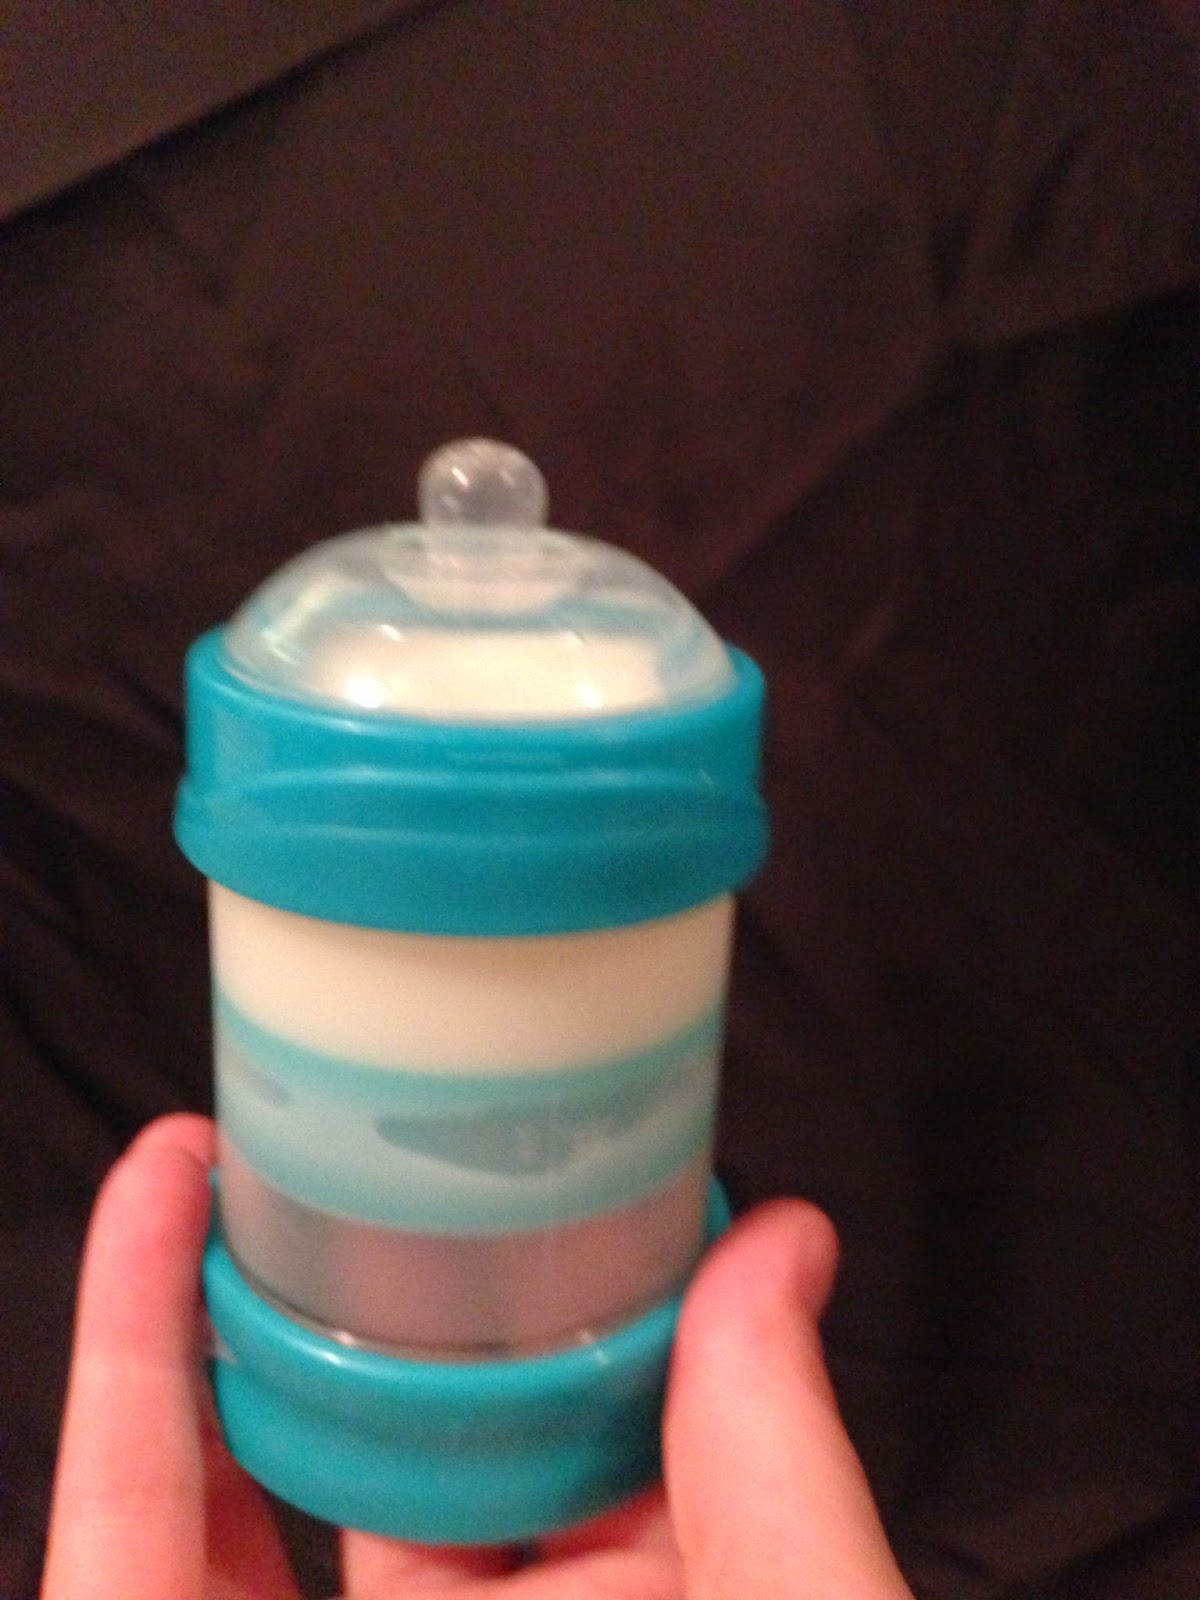
The design of the nipple is very neat. It looks like the old style nursing bottles, which in my experience, breastfed babies seem to prefer. 

The Perfe-latch nipple features a short teat to stimulate baby to latch on areola (wide part of the nipple) and maintain a good seal. The teat extends when baby latches and sucks properly, to help prevent nipple confusion. No need for nipple stages; different size orifices on nipple’s teat allow baby to control flow rate with suction strength.”


 Because of the air free design, the BARE bottle can be used while baby is sitting up. This positioning is helpful when doing paced bottle feeding, which is very beneficial and the recommended way to feed babies. (Read more about paced bottle feeding, and how to bottle feed a breast fed baby here.)


 “From the way our nipples extend inside the baby’s mouth to the way air-free milk is dispensed only upon suction and natural flow that’s controlled by the baby’s suction strength, Bare® is designed to mimic a mother’s breast.”
 
 When baby is done sucking on the BARE bottle, or takes a break, air does escape into the nipple. It is not much, but definitely there. You can easily expel the air again. 


 If baby drinks all of the milk in the BARE bottle, this is what the bottle looks like. Since Bunny is past the bottle stage, I emptied the bottle and when the bottle was empty, I could feel the plastic underneath the nipple. 


It is recommended to hand wash the BARE bottle because the high temperature of the dishwasher could damage the parts. I personally prefer to hand wash baby bottles, instead of putting them in the dishwasher. If hand washing bottles is a deterrent, this might not be the bottle for you. 
 
Overall, the BARE bottle has a unique and wonderful design. I do think the air plug takes a bit to get used to. Once I got the hang of using the air plug, I no longer had leaks. I will definitely try this bottle with my next baby.

You can purchase BARE baby bottles here for around $15 each.


Disclaimer: I received these items free to review. My views and opinions are my own. 

Co Sleeping and Why we do it

Before I had Bunny, and when I was pregnant with her, I was adamant we would NOT co sleep! What is co sleeping? Co sleeping is when you sleep in close proximity to your infant or child. When you sleep in the same bed as your infant or child, it is often called bed sharing instead of co sleeping. I told My Love that would NEVER happen to us! Babies don’t belong in the bed with us! That is our special place, our safe haven from the world where we can talk and laugh and be alone. I would never be the mom that co slept! EVER!


Then Bunny was born. Three weeks early. She was breech, my water broke at 37 weeks exactly, and Bunny was born via a non emergent, non planned c-section. Because she was born early I felt I needed to recreate the womb as much as I possibly could. I held her skin to skin as much as I could. Even at  night. Bunny slept on my or My Love’s chest for the first 6 weeks of her life. My Love and I slept in our bed, so Bunny slept in our bed, on our chests. I did what I said I would never do, co sleep. I couldn’t imagine putting Bunny in her own room, much less her own bed in her own room! When Bunny was about 6 weeks old, she started sleeping on our bed instead of on our chest. We have a king size bed so there was enough space. It was magical for night feedings! When Bunny woke up to nurse, I would change her diaper then lay down and nurse her back to sleep. I would fall asleep with her. I got so much rest! I didn’t have to get up and go into another room, didn’t have to sit up, awake, while she nursed! I could fall asleep with her. It was wonderful!

We peacefully co slept until Bunny was five months old. At around five months, Bunny started moving in her sleep more. Because she was moving so much, we needed her to have her own space. We decided to use a crib side car style. It is an extension of your bed. It worked out wonderfully! We still have the crib next to our bed and everyone gets a decent nights sleep! 

Crib is side car style


There are a few “safety” concerns, soft objects blocking baby’s airway, baby not being able to roll over or move his/her face out of the mattress, mom or dad rolling on baby in the middle of the night. We addressed those by not having a comforter on our bed, only using a light blanket, Bunny wasn’t allowed to sleep on her tummy at night until she learned to roll over by herself, My Love and I never take any medication that impairs our thinking or motor skills or drink alcohol. When you are sleeping with your baby, you are hyper aware of them and their every move. I could feel Bunny breathing all night long. I was NEVER in danger of rolling on her or suffocating her. In fact, when we moved her to the crib that is side car style next to our bed, I did not sleep well for the first few nights. I was so used to feeling her next to me, feeling her breathing, it was odd not to be able to know she was breathing without staring at her in the dark. 

sleepy baby in the middle of the bed during nap time NOT at night
Here are some facts about co sleeping and bed sharing from kellymom. 
Dr. Sears has done extensive research on co sleeping and its benefits. 
Who doesn’t want to wake up to a smiling baby face every morning?!


Baby Leggings (leg warmers) Review

Bunny is tall and slim. Always has been. She has stayed in the 90% for height and 15% for weight her entire life. This makes it hard for pants, or anything that goes around the waist, to fit her. Bunny is now 14 months old. 12 month pants/shorts/skirts fit her waist but are way too short length wise. 18 month pants/shorts/skirts fit her length wise but are way too loose around her waist. My solution to this is baby leggings! Baby leggings are leg warmers for babies. 
 
There are a few different brands of baby leggings, the most popular are babylegs and judanzy. They both seem to fit the same. One brand doesn’t fit better than the other. 
There are two sizes of baby leggings, newborn and one size. Bunny wore newborn size until she was about 3 months old, the fit is different for each baby. Bunny is 14 months currently and is still wearing the one size. 
Perfect with a onsie.
 
Baby leggings are absolutely adorable! I pair them with dresses, onsies, rompers, shorts, skirts, anything! One time we were out and I forgot Bunny’s jacket in the car. I had an extra pair of baby leggings in the diaper bag so I used those on her arms to keep her warm! There are so many different colors and patterns of baby leggings, one for each outfit! There are holiday leggings, ruffled leggings, every kind you can think of!
Baby leggings go well with a romper!
Baby leggings are great for layering. We visited the snow a few months ago and put a pair of baby leggings on Bunny under her pants to keep her extra warm. When we recently visited San Francisco, baby leggings were a great way to layer clothes on Bunny. If it got too warm we simply took the baby leggings off. If it got to be cold again, we put the baby leggings back on. 
Works wonderful as tights!
Diaper changes are SO MUCH easier when Bunny is wearing baby leggings. I don’t have to pull the baby leggings off her, I don’t have to struggle with pants around her ankles while trying to wipe. Diaper changes are a breeze when Bunny is wearing baby leggings. I highly recommend baby leggings to all my mama friends. Baby leggings are not just for girls either! I have many friends with boys who use baby leggings. I have plenty of baby leggings waiting for a little baby boy to wear! 
Newborn Baby Leggings SO CUTE!


MommyCon San Francisco!!

My Love, Bunny and I were so excited to attend the MommyCon in San Francisco! MommyCon is a convention dedicated to bringing mothers to be and modern parents together, along with brands and ideas that focus on the shared ideals. The focus is on natural parenting methods and timeless tidbits as we journey through parenthood together. 

MommyCon had many vendors and booths, they were very informative and helpful. There were car seat specialists, slings, wraps and soft structured carriers, all there to answer questions and help you find the best product to fit your needs. It was wonderful to see so many babywearing moms! Everywhere I looked there was a happy baby attached to a person! Moms and Dads alike! There were nursing moms everywhere, not using covers and NOBODY cared! There was a nursing room for those who wanted to use it. There were seminars about amber teething necklaces, breastfeeding support, baby wearing, cloth diapering, car seat safety and more! The environment was very warm and friendly. I wish I could attend a MommyCon every weekend! I was happy to see some brands I already knew about, and thrilled to see some new brands and products I had never seen or heard before! I am so excited to try some of the new products! Alanis Morissette spoke at MommyCon but I sadly wasn’t able to hear her. Bunny was tired, too tired to stay.

 Did you attend MommyCon? Did you hear Alanis Morissette speak? Leave a comment about your experience! 
Want to learn more about MommyCon- click here.

Lillebaby Complete Giveaway

I love the Lillebaby Complete Carrier so much I am giving one away to a very lucky reader! 

Enter to win here!

Rules for the giveaway are as follows:
Fill out the form.
“Like” All About Baby’s World Facebook Page.
“Like” Lillebaby’s Facebok Page.

That’s it!
The giveaway will close on May 1, 2014 at 11:59 pm
and the winner will be announced via Facebook on May 2, 2014.

Do you want to know why I love the Lillebaby Complete Carrier? Find out why here.

Home Made Granola Bars – Bunny’s Favorite Snack

Bunny LOVES granola bars. I had a ton of oats sitting in my cupboard so I decided to make some granola bars. They turned out AMAZING! My Love told me I was not allowed to make them again because they were so delicious he wanted to eat them all! They are fairly easy to make and taste amazing. Everyone is bound to like them. The best part is, they are 100% customizable! 

Here are the ingredients:

2 cups oats, not instant oats
1/4 cup butter (optional)
1/3 cup honey
1/4 cup brown sugar
1/4 cup wheat germ (optional)
1/4 cup flax seed (optional)
1 cup craisins 
1 cup pecans
1 cup chocolate chips
1 tablespoon vanilla extract
1 tablespoon sea salt 


This recipe is easy to substitute your favorite things in. If you don’t like pecans, use any other nut! If you don’t like craisins, use any other dried fruit! If you don’t want dried fruit or nuts, don’t add them! I made one batch with butter and one without. I did not notice a big difference, using the butter is completely up to you! I prefer sea salt to table salt because sea salt can be bigger. I personally like getting a tiny chunk of salt in a bite, it makes the sweet sweeter. Wheat germ and flax seed are optional as well. Both have wonderful health benefits, and are great for boosting and maintaining milk supply for nursing moms. (They won’t hurt you if you are not nursing, nor will they induce lactation.) They are optional, the recipe will taste just as great without them! You can add less chocolate chips, or more, if you’d like! We make our own vanilla extract (AMAZING flavor), but if you don’t have homemade vanilla extract, try to use the real stuff, not the artificial flavoring. I like to use local honey, it tastes so much better in my opinion (I ran out of local honey for the photo and had to use my back up honey :). 

Directions:

pre heat oven to 350 degrees

while oven is pre heating, chop pecans into desired size

whole pecans

chopped pecans


place oats and wheat germ in an oven safe pan

bake oats and wheat germ for 15 minutes, stirring once at 10 minutes.

In a big bowl, combine flax seed, craisins, chopped pecans, and sea salt and set aside for later. 

craisins, pecans, flax seed and sea salt


Once you have stirred the oats and wheat germ at the 10 minute mark, combine butter, honey and brown sugar in a saucepan on the stove top on medium heat. Once the butter, honey and brown sugar are mixed together, add the vanilla extract. Stir often to keep the mixture from burning. 

The oats and wheat germ should be done around the same time the butter, honey, brown sugar and vanilla extract are done. 

Pour the oats and wheat germ into the big bowl you set aside. No need to stir!


Pour the butter, honey, brown sugar and vanilla extract combination into the big bowl and STIR! Stir until everything is coated in the butter, honey, brown sugar and vanilla extract mix. 

crasins, flaxseed, salt, wheat germ, oats and butter, honey, brown sugar and vanilla extract mixture 


Let sit for 5 minutes.

after it had been stirred, doesn’t it look yummy?!?


While it is sitting, carefully place tin foil in the pan. This makes it easier to remove the granola bars. You can use a little non stick spray in the pan instead of tin foil. 

After 5 minutes, pour HALF of the chocolate chips into the bowl. This is important! The first time I made this, I did not wait the full 5 minutes AND I poured the entire cup of chocolate chips in the bowl. Most of the chips melted and I had melted chocolate all over my oat mixture! It tasted delicious but did not look quite as delicious. Stir in the chocolate chips.

MMM add the chocolate chips!


Once the chocolate chips are stirred in, pour the mixture into the pan. 

Wet your hands and firmly press the mixture into the pan. Sprinkle the rest of the chocolate chips on the granola and firmly press them in. Continue to firmly press the granola for 2-3 minutes. The firmer you press, the more likely they are to stay in the form of a bar. 

Almost ready! 


After you are done pressing the granola into the pan, let them sit for 2 hours. 

After 2 hours, cut, serve and enjoy!

Yummy!!!


The tin foil comes in handy here. Simply cut the granola bars into desired size, pick up the tin foil, turn it over and gently press the granola bars into the pan. Viloa! Plus it makes the pan easier to clean 🙂

easy cleanup!

Some information about wheatgerm – Dr. Ozgood for baby, and health benefits.
Some information about flax seed – health benefitsfacts on flaxseed, for nursing moms.